My Pharo Journey - Making a Simple To-Do List with Spec2


What's Pharo?
Pharo is a purely object-oriented programming language that comes in a powerful environment that focuses on simplicity and immediate feedback. It is a very powerful tool, that creates an immersive environment, where you can even see the source code of the environment, after all - "Pharo is written in Pharo".
The environment comes with an amazing debugger that lets you create objects and methods on the fly, as and when required. This leads to an easy form of test-driven development. Not to mention, Pharo has a great community with many helpful people, who are always willing to understand your issue and solve your problems!
GUI in Pharo? How?
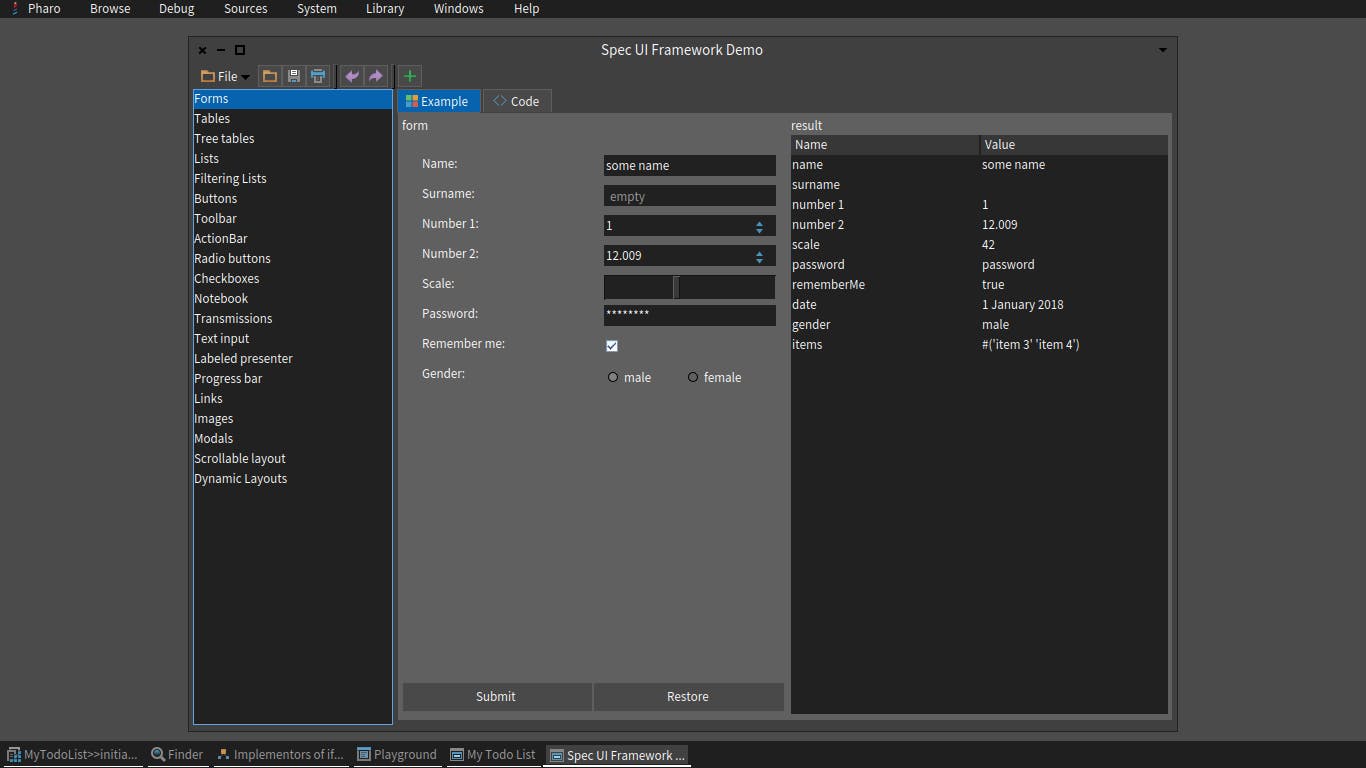
We will be using Spec2 to be making our GUI. Spec2 is a framework for describing user interfaces. You can learn how to use Spec2 from here. Also, you can learn it from the examples present in the Pharo environment itself just go to: Help -> Spec2 Examples
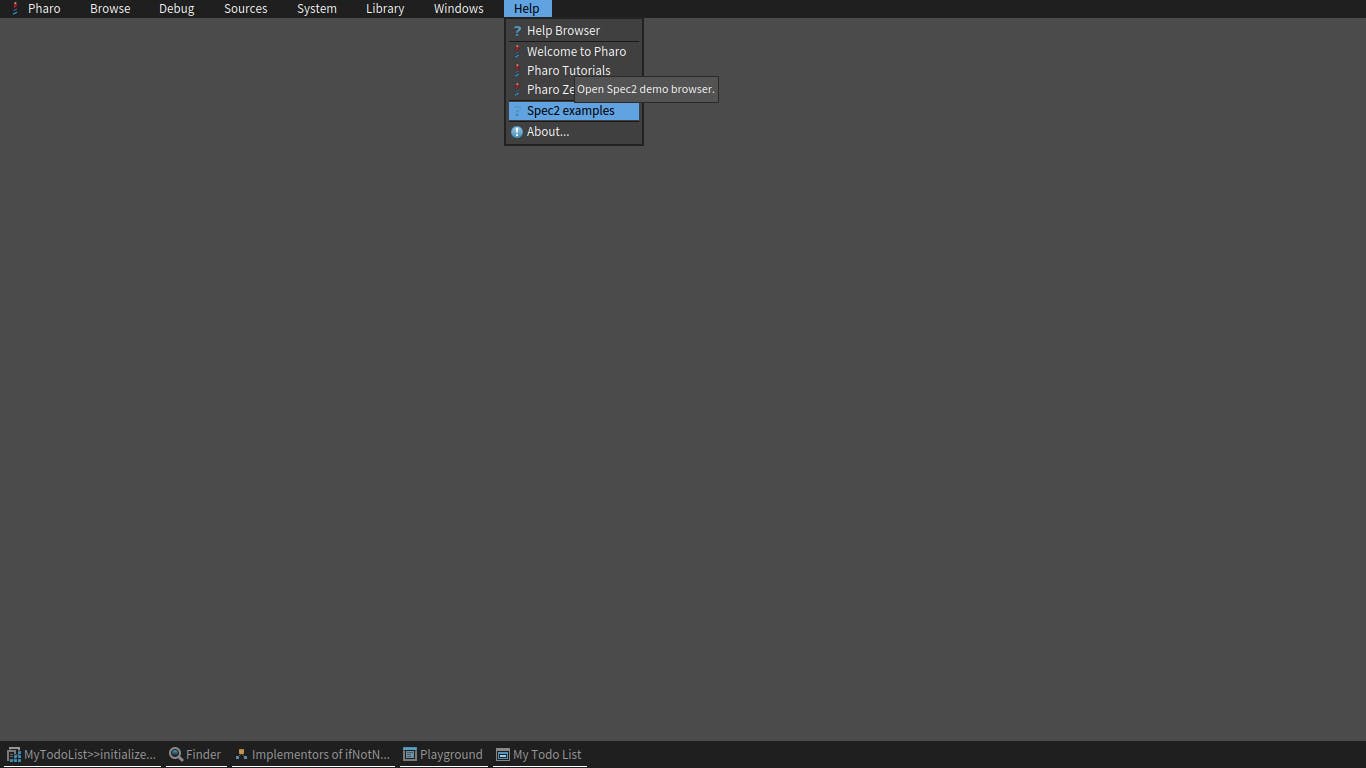
You can see how the code is written for particular layouts and play around with them:
If you don't have Spec2, you can get it by entering the following on the playground and running it:
    Metacello new
        repository: 'github://pharo-spec/Spec:Pharo10';
        baseline: 'Spec2';
        onConflict: [ :e | e useIncoming ];
        onUpgrade: [ :e | e useIncoming ];
        ignoreImage;
        load
What are we making?
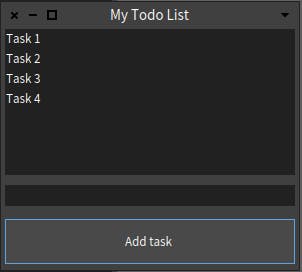
Today we will be making a very simple application - a To-Do List within Pharo. This is quite a useful thing to have in the Pharo environment so that you can see what things you have yet to do and program. For our To-Do List, we will be having three components:
The list of To-Do tasks
The button to add a task
The text input for writing the task to be added
The functionality will be as such:
You can type into the text field what your task is
You can click on the add task button to add the task to the list of tasks
If the text field is empty, then no task will be added
If you double-click the task in the task list, then it will be removed from the lis
Coding
Application
We will first start by making a package called MyApplication and an SpApplication - I will call the class as MyTodoListApp
SpApplication subclass: #MyTodoListApp
    instanceVariableNames: ''
    classVariableNames: ''
    package: 'MyApplication'
To start our application, we will be using the start method, and override it from SpApplication. So create a new method in that class called start:
MyTodoListApp >> start
    "This method is overriden to start the app,
    we create a new instance of the presenter for it"
        (self new: MyTodoList) open
Here, MyTodoList is a presenter class, that we will be creating shortly. Any string enclosed between double quotes will be a comment. However, this code looks a bit off in terms of spacing, in the environment it looks like this:

We want our code to look uniform and formatted nicely. If you are using Pharo to code it, press Ctrl+Shift+F to format the code and it will look much better:

Now that we have entered the code, we can press Ctrl+S to create the method and continue.
Presenter
We want to now create the Presenter class. So go ahead and create your SpPresenter :
SpPresenter subclass: #MyTodoList
    instanceVariableNames: 'taskList addTaskButton addTaskText taskListPresenter'
    classVariableNames: ''
    package: 'MyApplication'
Here, we will be requiring four instance variables:
taskList- This list stores the list of tasks that should be presented, it is internal to the presenter object.addTaskButton- This is the add task button componentaddTaskText- This is the text field component that we will be using for adding tasks.taskListPresenter- This is the component that we will be using for showingtaskList.
Now, we will go ahead and make our overridden methods:
MyTodoList >> initializePresenters

    self instantiatePresenters.
    self initializeLayout
We shall create the method to create instances of the parameters:
MyTodoList >> instantiatePresenters

    "Here we will initialize all the components that we will be using"

    "Task List"
    taskList := #( 'Create a to-do list in Pharo' ) asOrderedCollection.
    taskListPresenter := self instantiate: SpListPresenter new.
    taskListPresenter
        items: taskList;
        activateOnDoubleClick;
        whenActivatedDo: [ :itemToRemove | self removeTask: itemToRemove ].

    "Button to add tasks"
    addTaskButton := self newButton.
    addTaskButton label: 'Add task'.

    "Text field for adding task by name"
    addTaskText := self newTextInput
Task List
In the first part, we make the task list object as an OrderedCollection with a dummy task inside it. This OrderedCollection is like a list in Python, to which we can add and remove elements sequentially.
Next, we create a SpListPresenter object and assign it to the respective object. We give it some parameters:
items:- the list that has to be displayed by itactivatedOnDoubleClick- to act (in our case task removal) only when an element in the list is double-clickedwhenActivatedDo- when the element is clicked, this method should execute, here we have used a method calledremoveTask, which we will be defining later.
Button
After creating that component, we make a button for adding tasks and labeling it accordingly.
Text Input
Finally, we create a text input field where we can enter our tasks.
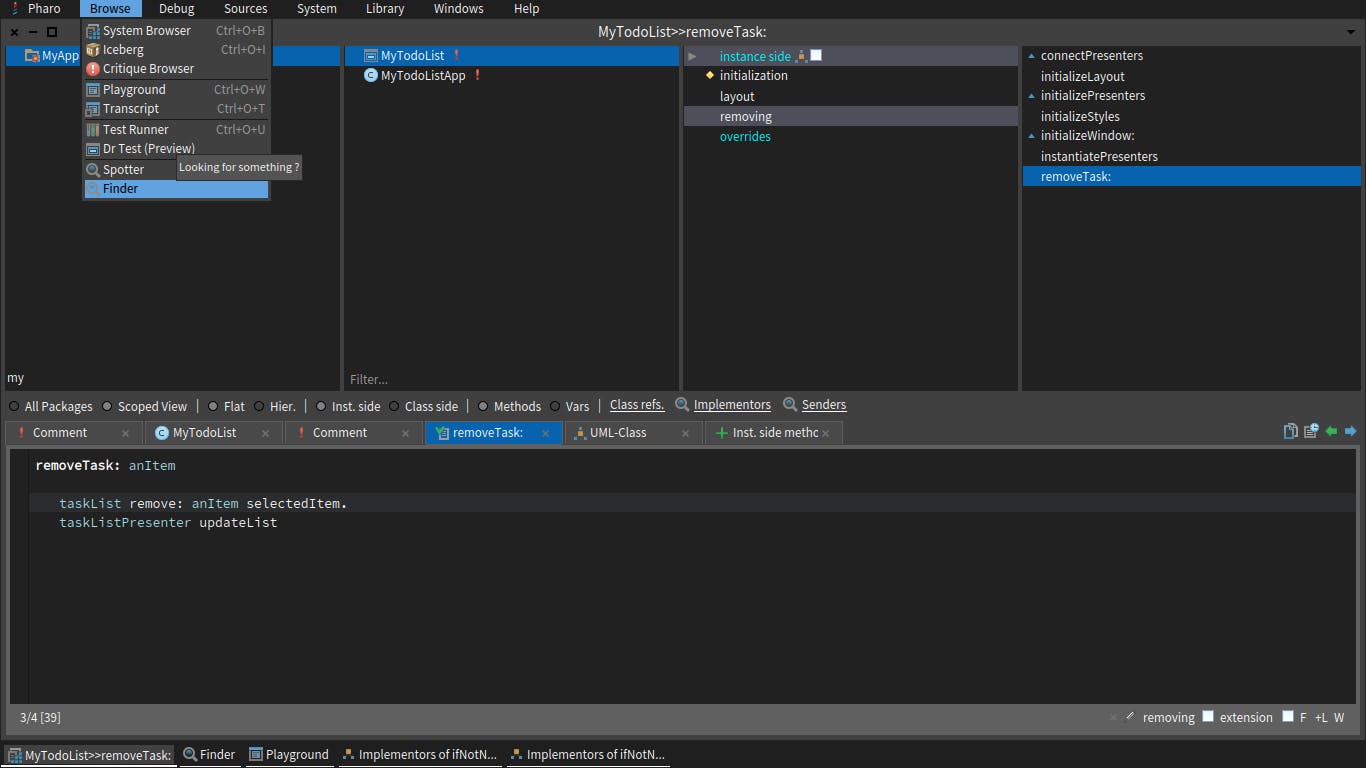
removeTask
Next, we can move on to creating the removeTask method that we used in the taskListPresenter. As you have seen in the code, we pass the item to remove the method as a message.
MyTodoList << removeTask: anItem

    taskList remove: anItem selectedItem.
    taskListPresenter updateList
Here the item that is passed is the one that was double-clicked. To obtain its text value we pass the selectedItem message to it. This removes it from the internal list.
Using Finder
Now that we have updated the internal list, we must update the presenter as well to show the modified list. But what if you forgot which method does this? Well, we don't need to worry because we can use Pharo's Finder to help us out:
Open Browser -> Finder from the toolbar. You should get a window like this:

Here we can search for the classes and the selectors that we are using, so go ahead and enter SpListPresenter in the search bar:

Note that the Finder doesn't search on its own. You can see that there is an orange triangle in the corner of the search bar. Press Ctrl+S to execute the search:
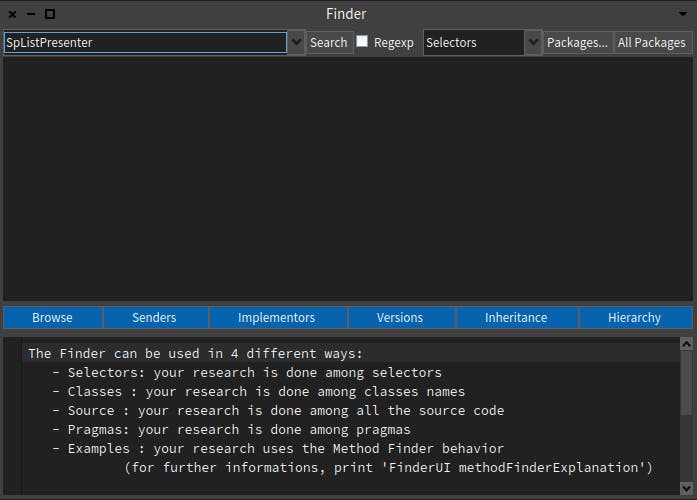
Again, we are not able to see anything! But why? This is because we have selected Selectors in the drop-down menu. We know that an SpListPresenter is a Class, so go ahead and change that.
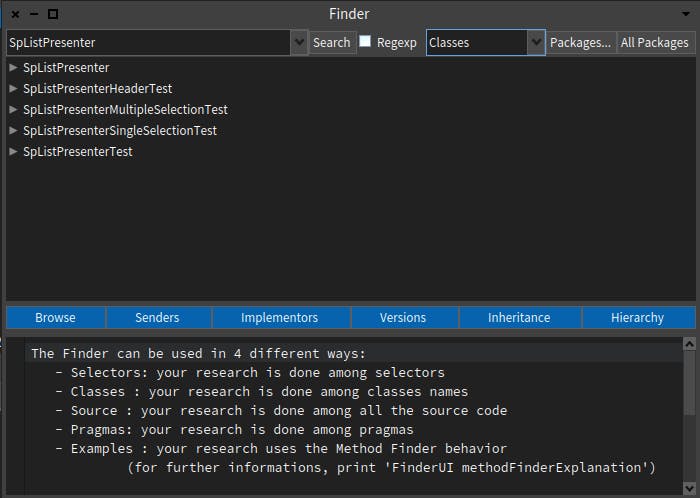
And Voilà! We have found our class in the Finder. But what next? We can click on the object and read through the documentation that comes up. Next, we can scroll down till we see a method called updateList

After clicking on it, we can see that this is the method that is required, from the documentation. So for now, we come back to our methods and send the updateList method to taskListPresenter.
Layout Initialization
The next part is to define the layout of our components in the GUI window. We do this in a method called initializeLayout :
MyTodoList >> initializeLayout

    self layout: (SpBoxLayout newVertical
             add: taskListPresenter;
             add: addTaskText;
             add: addTaskButton;
             spacing: 10;
             yourself)
In this method, we are returning what the layout of the GUI should be. We want to keep our list presenter at the top, followed by the task-adding field and the adding task button. We want to keep the spacing of 10px in between all the components.
Behavior Management
To manage the behavior of the adding task button, we want to override another method called connectPresenters :
MyTodoList >> connectPresenters

    "Here we will define the behaviour of the different elements"

    addTaskButton action: [
        addTaskText text = '' ifFalse: [
            taskList add: addTaskText text.
            addTaskText text: '' ].
        taskListPresenter updateList ]
Here as you can see, we are adding an on-click action to the button. We check if the text field is empty. If it's not empty, then we add the text to the task list internally. After that, we will clear the text input field for adding the task(set its text to an empty string). Finally, we want to update the list.
Window Initialization
Last but not least, we want to make an overridden method for initializing the window, we set its dimensions manually:
MyTodoList >> initializeWindow: aWindowPresenter

    aWindowPresenter
        title: 'My Todo List';
        initialExtent: 300 @ 270
Result
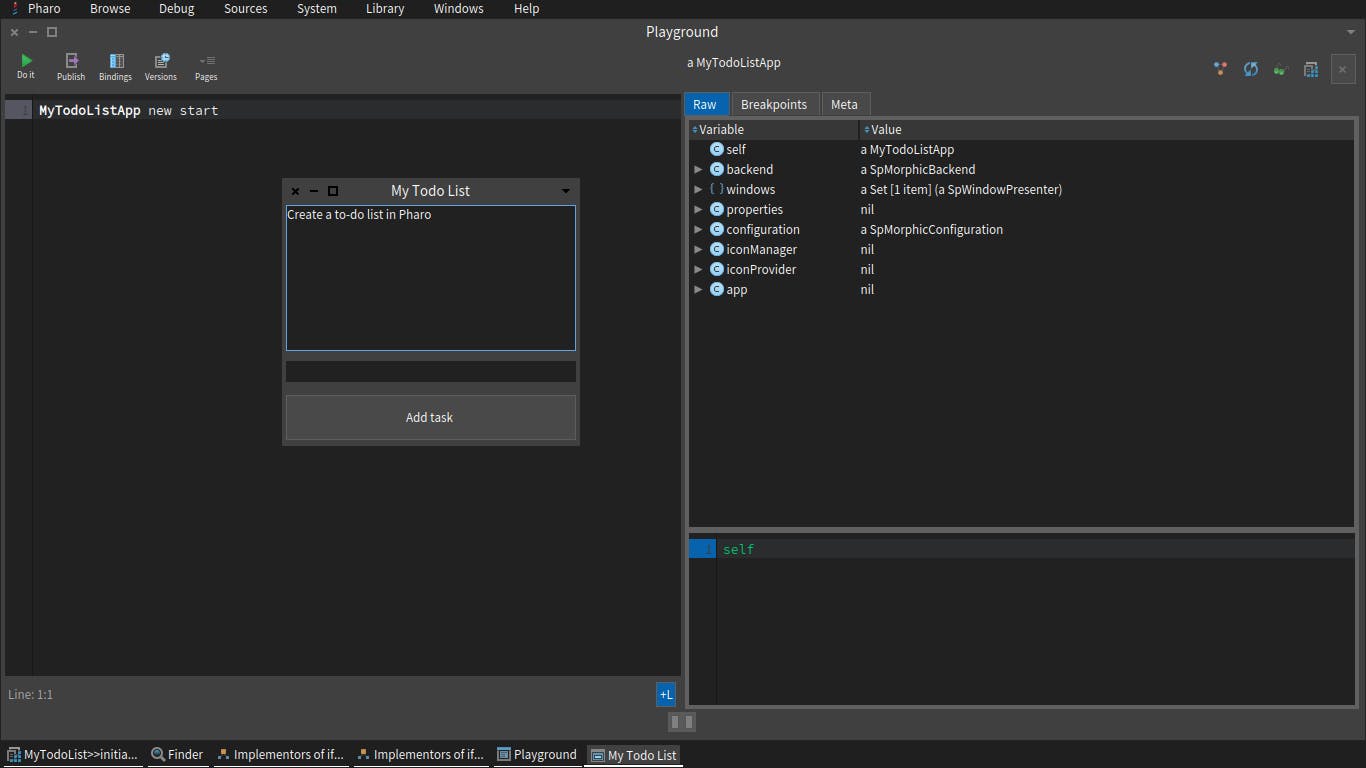
Now that we have created the class and all the components, we can use the Playground to see our To-Do List:
MyTodoListApp new start
Press Ctrl+D to do it and you will see the window as such:
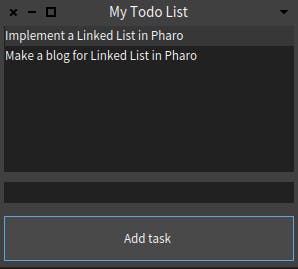
You can now play around with adding tasks and deleting them:
I have added the things on my To-Do List:
Thanks for reading! Free free to leave your suggestions in the comments below!